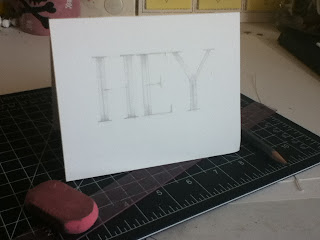
Who doesn't love little hand-made how-do-you-do's? I'll walk you all through step by step on how to make your own little greeting cards!
Materials:
Plain Heavy Weight Paper (Bristol Board will do just fine!)
X-acto Knife, or any box-cutter really.
Pencil and Eraser (I use a 3h pencil for all of my sketching, just because it's light and easily erasable!)
Something to ink up your super cool cards! Be it marker, pen or brush, that's up to you!
Step one.
Measure out the size of your greeting card!
It's 5.5 inches tall and 8.5 inches wide (with a line drawn at 4.25 to mark the fold line)
Step two.
Cut out carefully along the line, and viola!
Step three.
So here, to make the card much easier to fold, we're going to make a little sort of half cut in the paper. Instead of pressing the blade all the way through the paper, just lightly run it along the line drawn for the fold.
Folding made easy!
Step four.
I drew lines 1.5 inches for the boarder all around, to get a general idea of where I wanted the text. I then added a 1/2 inch to the sides and top as shown below:
I've also divided the space into thirds so all the letters remain evenly sized.
Step five.
This is the "skeleton" of the letters , because they're pretty much the inner bare bones of the letters we're going to be making!
Step six.
So to put some meat on these bones you can take a ruler to measure out everything, or take a small piece of paper and mark the desired width of the letter to use for a consistent size! And if you're feeling fancy, you can add serifs! I sure did:
And this is what it'll look like when it's all penciled out!
A note on the E and Y; The three horizantal lines for the E are all different sized, the longest being on the bottom, and the shortest being in the middle. The serifs are half the size on the bottom and top, and full sized on the middle line. For the Y, the weight is heavy on the left side, and lighter on the right. I made the right side half the width as the left and vertical line.
Step seven.
Ink it on up! Above is the outline which I did with a 005 micron, and shown below is the final product! I used a brush mircron to fill in the letters, and the sharpie to make the boarder.
Pretty darn awesome, if you ask me.
Now all that's left is for you to write up a lovely little note to whichever darling you wish to and send it off!
Love and Strawberry Kisses xo


No comments:
Post a Comment