Showing posts with label DIY. Show all posts

Monday, June 4, 2012

Makin' it Monday: DIY Lucky Penny Sweater Clips

This past weekend, going on into today, was chalk full of wedding anniversaries and birthdays! My uncle's anniversary was the second and my parent's anniversary was yesterday! (Happy Anniversary Mom and Dad!!) Yesterday was also Emma's Birthday!! She's one of the best friends I could ever have and truly the raddest of the rad, I'm beyond stoked that we're good ol' kindred spirits- even if we live so far apart now. And it's my oldest sister's birthday today! So many exiting things! I should be eating copious amounts of cake!! Haha, love and congrats to all y'all!


So, birthdays and weddings aside, today's post really all stemmed from Robin giving me her wisdom teeth and me wanting to make sweater clips out of them. She had two whole ones and two that were split in half, cool beans to be had all around. And since I find it a little unlikely that you all have a wide array of baby/wisdom teeth laying around to make sweater clips from, we'll just go with lucky pennies! I happen to have a LARGE collection of lucky pennies that I feel weird about cashing because, well, they're lucky. So I keep them in a skull and always in my boots. Occasionally I go for long walks and leave them laying about for other people to find who need a boost of luck. Is that weird? Oh well. Onwards with the tutorial!

One. 
As always, gather the ingredients! 

Earing Bases (I got mine at Joann's)
Pennies, or anything you want really.
Hot glue
Necklace Chain
Wire-cutters


Two. 
Plug in your glue gun. Take note, the warning on my glue gun does not say "may burn" no, no. It says "Will Burn." Take heed of these warnings dear readers, for they are so terribly true.

Two and a Half.
Cut down your earings! You don't want them poking you, that'd be just down right irritating. The earing on top is uncut, just for size comparison.


Three.
Take your shortened earing bases and carefully place the ends of your chains (which you should cut into your desired sizes prior to this! You can have as many chains as you want really, I have two for this one)  are around the point and touching the base. 


Four. 
Secure the chains in place with some hot glue. Be careful for your fingers! Make sure that the glue doesn't get too high up the earing, you've got to get the backs of the earrings on!

.

Five.
 Pick out your pennies! I'm always so amazed at how different they all are! And I've got pennies on my hand from the 60's! It always baffles me that some things last so long and have been probably meaninglessly apart of so many different lives and discarded without thought. Golly.


Six.
Attach your chosen pennies with some hot glue.
'

Viola! You have a sweater clip that will bring you buckets of luck! Of course I didn't have a cardigan on hand because that would be too logical, but I still think it looks sweet!


And with that, I leave you!


Love and Lots of Luck xo

Tuesday, May 29, 2012

How-Tuesday: Glitter Shoes!

I'm just darn mad about glitter shoes. They're the tops! So after seeing a few DIY glitter shoes on the good ol' internet I decided it was high time that I make my own! I would just like to preface this post by saying this guys take time! Alas, they're a full day/ two day project! But still awesome to have, either way.

These are the first pair of Doc's I've ever owned, they're hand-me-downs which I seem to be quite lucky at getting hand-me-down docs, I have three pairs none of which I've paid for.


 The full list of ingredients:
Shoes, Mod-Podge (matte)
One large cumbersome brush
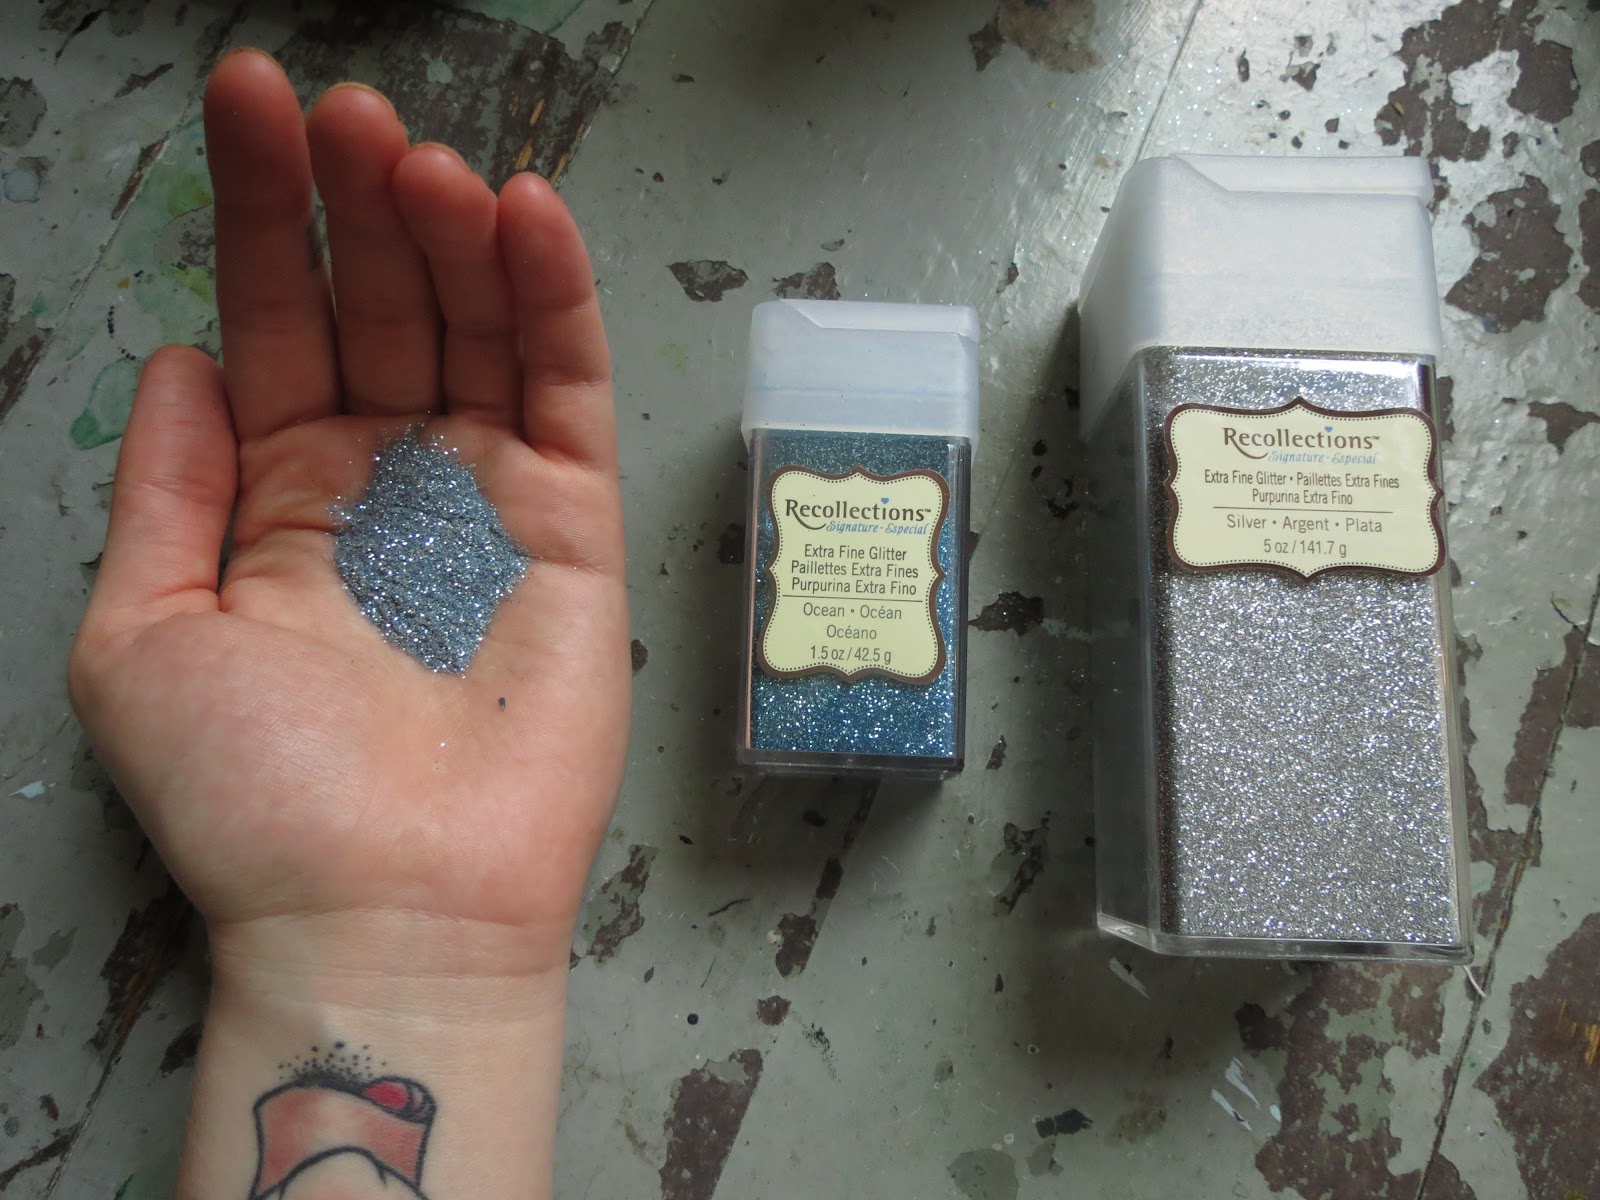
Glitter (I should hope so!)
Tape, for any place you don't want to paint!
and a bowl that you don't eat from.


I wanted a blue/silver glitter, so I mixed the two together until I got it the colour I wanted!


I made the endevor to tape off my shoe (just one) only once, I figured if I paint for a living, I should be able to paint my shoes no problem! Right?


So I poured some mod-podge into a bowl,  and slowly added my glorious glitter concoction untill I was satisfied with how much glitter was in there. You don't want it to be over-loaded with glitter because it'll be a pain to get on. So when pouring have enough glitter in there to get a good coat on, but not enough to make it cumbersome to use. This is what the first coat looked like!


Here's what the second coat (wet) looked like next to the other one-coat-boot. You can also see the cool design thinger I had going on as well! You want to make sure everything is completely dry before applying the next coat!


To get the tongues! I used a micron to keep my boot open and not touching the tongue at all, I didn't want the boot to somehow seal itself shut. That would be rather unfortunate.


All in all, I did two coats and then a third touch up coat.


The final step is to Mod-podge over the very dry glitter! The boot on the left has gone through the final phase, the one on the right is pure glitter still!


After letting them dry, you can lace these babies up and take them out on the town! Not that our town is very large. Or really exiting. I mean, we do have a coffee shop that I love, but that's neither here nor there. But aren't these the raddest of the rad?! I'm wearing them everywhere I go!


Love and Glitter filled Kisses xo

Monday, May 28, 2012

Makin'it Monday: Found objects hanger thing!


What are these things really called? I have no idea! But I made one! I was out on a walk and found these two peices of wood, which of course I picked up and threw in my bag, because that's just what I do, and instead of hanging them from my ceiling (which is what I normally do) I decided to make something out of them! I had these old nails laying around since forever ago- they were the nails used to build out house so they're from sometime around the 1830's! How cool?! Anyways, here's how I did it!


These are all the materials I used! 
(minus the glue, really.)


I hammered in my three nails, one was a bit stubborn and required some glue to hold it in there.


And so I went and put some glue down on my wood, and it turned bright purple! This photo doesn't quite do it justice, it was florescent. What is with that?! It was too weird. So I wiped it off, and went for the probably better alternative, hot glue!


After getting that situation all taken care of I carefully attached my Lichen covered wood.


Then I came upon the realization that I needed to hang this bugger up! I wasn't really sure how to go about it anyway proper, so I took some metal thread and thumbtacked it to the back, and while that did work, it would tip forward and nothing would stay on the nails. So that was a bummer, and then I realized I could just but something to prop the wood off of the wall to prevent that from happening, so I stuck on two more thumb tacks, and they worked like a gosh darn charm! 


And that's how I made that! I was so proud of myself, really. I've got a few necklaces hanging from it now, but since my camera is making every single picture of it blurry, you'll just have to to use your imaginations!

I'd also like to give a shout-out to my super rad Dad!
It's memorial day, and while for most people it means parades and super sales- we use it to remember those who've served, and those we've lost. He's gone through two tours in Iraq, and has been proud to serve his country throughout the years. He's truly an amazing man, and I couldn't be more honored and lucky to have him as a father! 


Love and Creative Kisses xo


Tuesday, May 22, 2012

How-Tuesday: Curious Little Dream Catcher

I had, and have the hardest time sleeping. When I was younger I had terrible nightmares and couldn't sleep with the light off at all! So, as a result, I've aquired several dream catchers, and a few sleeping charms (that my dad brings me home when he goes off on his travles). So! I thought I'd share how to make one all for yourself!

Step one.
Gather your ingrediants! You'll need:
A hoop of some sorts
Twine
Something to hang from your dream catcher! Be it feathers, or in this case, broken glass. In the end I used different glass from what was originally pictured, but I'm fairly certain the idea comes across the same!


  Step two. 
Begin wrapping your twine around the hoop, not too tight though! Otherwise you won't be able to keep looping the thread through!


Wrap the twine all away around your hoop.


Then begin looping the twine through what you had just previously wrapped around the hoop.


Once you've done that, you're going to do it again!


And again!


Until you've decided you're good and done, or you just can't seem to get the thread through those bitty holes anymore, either one.


Make a super tiny knot binding it together. There's a knot right above my middle finger in this photo, which isn't very visible at all, just the way you want it!


Step three.
Attatch the items you selected earlier to hang from the bottom of your dream catcher.


And there you have it! Your very own dream catcher! All fit and ready to be hung over your bed to catch all those bad dreams for you!


Many Sweet Dreams! xo


Monday, May 21, 2012

Makin' it Monday: Wish Necklaces!

There's no way I could keep doing food-related monday posts. I was planning them out, and it was going to be filled with pies and cookies and brownies and so many delicious things- but I need to lose weight! So I tried figureing out a good solution, which really just ended up being more DIY posts with the occasional yummy treat. (Plus, everyone who would eat anything I bake happens to be gone for this week!) It's my good friend Emma's Birthday in two weeks, so I've been thinking of presents to make for her and send as a package of awesome. So what better thing than a necklace full of wishes?!

Step one.
Gather your ingredients!
1 small glass vial with closure
1 seed-y dandelion
String, Twine, Chain, anything to use as your necklace chord. 
And a clasp for your necklaces is optional


Step two.
Capture some wishes!


Step three.
Find the middle of your chord.


Step four.
Wrap and secure around vial. If there's no way of getting your chord to stay on proper, you could either hot glue it, or rig a wire through the cork, or what ever closure you have!


 Step five.
Attach to necklace clasp, or knot to close!


And now, you have a necklaces full of wishes too! 


I may have made a few of these, because they're just so fun to make, and so pretty to wear! On a previous excursion I picked up more than a handful of glass vials, and have been trying to figure out things to do with them, so pretty stoked to have a few used. Now I have three different sizes to figure out something for! I see some serious crafting in my near future...


Love and Strawberry Kisses xo

Tuesday, March 13, 2012

How Tuesday: Pretty Simple, Pretty Awesome Greeting Cards.

Who doesn't love little hand-made how-do-you-do's? I'll walk you all through step by step on how to make your own little greeting cards!


Materials:


Plain Heavy Weight Paper (Bristol Board will do just fine!)
X-acto Knife, or any box-cutter really.
Pencil and Eraser (I use a 3h pencil for all of my sketching, just because it's light and easily erasable!)
Something to ink up your super cool cards! Be it marker, pen or brush, that's up to you!

Step one.


Measure out the size of your greeting card!
It's 5.5 inches tall and 8.5 inches wide (with a line drawn at 4.25 to mark the fold line)

Step two.


Cut out carefully along the line, and viola!


Step three.


So here, to make the card much easier to fold, we're going to make a little sort of half cut in the paper. Instead of pressing the blade all the way through the paper, just lightly run it along the line drawn for the fold.


Folding made easy!

Step four.

I drew lines 1.5 inches for the boarder all around, to get a general idea of where I wanted the text. I then added a 1/2 inch to the sides and top as shown below:


I've also divided the space into thirds so all the letters remain evenly sized.

Step five.


This is the "skeleton" of the letters , because they're pretty much the inner bare bones of the letters we're going to be making!

Step six.


So to put some meat on these bones you can take a ruler to measure out everything, or take a small piece of paper and mark the desired width of the letter to use for a consistent size! And if you're feeling fancy, you can add serifs! I sure did:


And this is what it'll look like when it's all penciled out!


A note on the E and Y; The three horizantal lines for the E are all different sized, the longest being on the bottom, and the shortest being in the middle. The serifs are half the size on the bottom and top, and full sized on the middle line. For the Y, the weight is heavy on the left side, and lighter on the right. I made the right side half the width as the left and vertical line.

Step seven.


Ink it on up! Above is the outline which I did with a 005 micron, and shown below is the final product! I used a brush mircron to fill in the letters, and the sharpie to make the boarder.


Pretty darn awesome, if you ask me.


Now all that's left is for you to write up a lovely little note to whichever darling you wish to and send it off!


Love and Strawberry Kisses xo